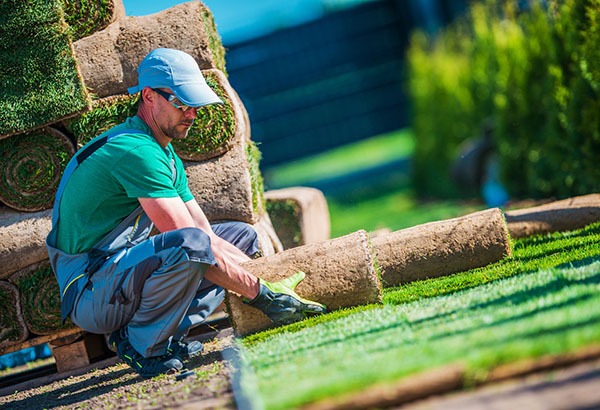
Turf installation is not something to take lightly. It’s a big investment, but the right preparation can make it much less stressful and more successful. This post is all about what you need to know before turf installation, as well as what tools you’ll need if you want to start preparing on your own!
Installing Sod Versus Laying Seed
First, it helps to understand the benefits of installing turf – that is sod – versus laying seed. Sod is a pre-grown turf that can be installed in a day or two, as opposed to waiting weeks for grass seed to germinate. Sod is also much denser than seed, meaning it’s less likely to get damaged and will need less watering and mowing.
The main downside of sod installation is the cost – it’s more expensive than turf seed. However, most people find that the cost is well worth it. While sod needs to be cared for and maintained, it’s a much easier path to a green lawn than seed. With seed, it’s a much bigger commitment. Seeds and new grass shoots need to be watered and cared for to stay healthy and grow without dying out. And there’s no guarantee that when it grows in you won’t have a patchy lawn instead of the thick green carpet you hoped for.
Tools You’ll Need To Prepare Your Yard
If you’re planning to install turf in your yard, there are several things you can do to prepare.
Tackle Weeds
For sod, the best foundation is a weed-free and even base. Weeds will compete with your grass – both when it’s being laid down and in its early stages of growth. It’s also important to have a clean surface free from rocks or other debris that could damage turf once it’s laid.
So before turf installation, it’s best to tackle weeds and clear your yard of any rocks or debris that could puncture turf when you lay it down. The basic tools for this would be rakes and garden spades. You want to make sure you really get stubborn weeds up from their roots, so this might require more labor than you had in mind! If you opt for professional installation, this “demo stage” is typically included in your quote.
Level the Playing Field
If there are areas where turf will be installed on an incline (like a slope in the back of your yard), make sure those sections get extra attention for leveling. You don’t want the turf to start slipping down the hill as soon as it’s installed! While turf movement is a less common issue, the bigger problems relate to watering and fertilization of your new lawn. If you have a noticeable incline, water will follow gravity and run downhill. That means that your turf up top will receive less water and fertilization. Additionally, water runoff with fertilizer can cause issues if the water diverts to a creek or canal. Avoid drainage issues by addressing leveling before your turf is installed. If you’re going to attempt to level your yard yourself, you may need a rake, a push broom or leveler tool, and additional sand and soil.
Rake and Compact the Soil
After you’ve cleared away any debris, it’s time to get your soil ready for turf installation. This involves raking and then compacting the soil. Raking will help level the surface and remove any large clumps. Compact the soil by walking over it, or using a roller if you have access to one.
This will help your turf stay in place and decrease the amount of watering and maintenance it will need down the road.
Tend to the Soil
Now is also a good time to fertilize your soil. The fertilizer gives your turf an extra boost of nutrients as it starts to grow. You can either use a pre-mixed turf fertilizer or one specifically for your type of soil. A simple soil test will help you determine what you need. And remember, a healthy lawn starts with good soil!
Why You Should Go with a Pro
Hiring a professional turf grower and installer could be the best decision for your dream lawn. They have the experience and knowledge to get the turf installed properly, so you can avoid common turf installation mistakes. They’ll also know which type of turf is best for your climate and soil type, as well as how to take care of it properly so you can enjoy a lush green lawn for years to come.
Now that you’re armed with the knowledge of what to do before turf installation, it’s time to get started on your dream lawn! For more tips and advice, head over to our blog for everything turf.
Final Tips for Turf Installation
There are a few final things to keep in mind when installing turf:
– Make sure the ground is completely dry before installation. If it’s too wet, the turf could be difficult to lay and it may end up with mold or mildew.
– Lay turf in the morning, when temperatures are cooler – this will help keep turf alive longer.
– Install your turf on a day that isn’t expected to rain for several days after installation (turf can hold about two weeks’ worth of water).
– Follow the turf manufacturer’s instructions for installation.
With these tips in mind, turf installation can be a breeze! Just make sure to take your time and prepare your yard well before starting. Have questions about turf installation? Leave them in the comments below!
Turf installation is a big job and can be daunting when you don’t know what to expect. That’s why we put together this turf installation tool kit so that you will have everything you need for your next project! And if you need help finding a grower in your area to help you install the best quality sod for your region, check out our directory!
